In my last post, I talked about being shown something that just blew my mind about the power of branches in Git and as I understood what was happening, this little experiment got me to REALLY understand just how changes are tracked in Git and how branching and merging works in Git, as well.
To begin with, if you don’t understand Git at all, or are really confused after reading this post, I recommend going to Git Immersion. I’ve found no better tutorial and it got me from 0 to successfully using the product pretty quickly. You have to have Git installed and configured if you want to follow along with my examples in this post.
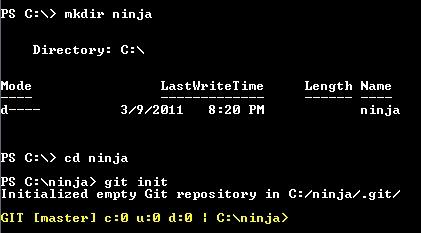
To start out, navigate to an empty directory. I opened my Powershell console and from my root typed these three commands, one at a time.
mkdir ninja
cd ninja
git init
I then saw the following:

Let’s create a text file in our directory containing the contents of the directory.
ls > DirectoryContents.txt
Now our directory looks like this:

Our next step is to add the file to be tracked by Git and commit it. I typed in these commands, one at a time
git add .
git commit -m 'Created Directory Contents File'
git status
My output looked like this

Now we are all set. I plan on doing some work on a feature here, so I’m going to branch this repo so that I can make changes in isolation and then merge back.
Type in
git branch pirate
git branch
The first statement creates a branch of the repository called pirate and then calling the branch command by itself lists the branches you have. You’ll notice that master is colored and has an asterisk (*) next to it, indicating that it is the branch that I’m working in.

Now if you issue these commands, you will see that we have switched ourselves to the pirate branch to do our work.
git checkout pirate
git branch

Now let’s delete the existing file and create a new one and look at our directory.
del DirectoryContents.txt
ls > PirateFile.txt

Okay, we’ve been having fun, but now we need to make an emergency fix back on the original file in the original branch. Let’s commit our pirate changes and switch back to master. If we just issue these commands we see that our directory is really just as we left it the entire time.
git add .
git rm DirectoryContents.txt
git commit -m 'out with the old, in with the new'
git checkout master

Now, let’s visit the pirate branch again.
git checkout pirate

To me, that really just threw a switch and I began to understand how Git was tracking individual changes one by one and could “play them back” against a repo to perfectly put you wherever you needed to be at any point in time. In TFS and SVN, you branch to another directory, which if you have a web app, causes a lot of IIS configuration changes. Even if you don’t do web apps, if you branch per feature, you are going to have a lot of “spare” directories lying around. That just makes my OCD hurt.
I know that SVN has the “switch” command, that takes the branch from the central repo (which is in a different directory) and puts it in your current directory structure. That certainly behaves a lot like Git branching, but when you add in Git’s other features, I’ll definitely have to choose Git over SVN as well as TFS.
Hopefully I’ve explained this well and you get exactly how powerful and simple this is and how Git can really alter your relationship with source control. My initial fears were that Git would get in the way (because of the command line stuff, etc), but instead Git has made source control get out of my way and just let me focus on dominating the codebase 😉
