 In the previous post in this Swift series, we looked at collections and iterating over those collections. In this post, I want to take a look at control structures. How does Swift allow you to make decisions in your code?
Much the same way that the for loop looked very familiar to us, only lacking parentheses, the if statement behaves the same way. As you’d expect, the following code outputs “You cannot register to vote”.
let age = 7;

if age >= 18 {
    println("You can register to vote")
} else {
    println("You cannot register to vote")
}
For a predefined number of “if statements”, many developers like to use a switch statement. Traditionally, in c-based languages, you would switch on a variable and then provide a case for each of your possibilities. Here is an example of a Swift Switch statement that would output “Back to the Grind” to the console.
let dayOfWeek = "Monday"

switch dayOfWeek {
    case "Saturday", "Sunday":
        println("Party!")
    case "Monday":
        println("Back to the Grind")
    case "Wednesday":
        println("Hump DAY")
    default:
        println("Just another day")
}
There are several interesting things to point out here. The first is that you don’t need break statements after each case. The reason for break statements is because when you want to have the same action for multiples cases, you would stack them without a break. In Swift, you just make a comma-separated list between the case keyword and the colon, as I did for Saturday and Sunday above. To me, this makes a lot of sense and is much cleaner.
If you omit the default option, though, you get an interesting error that says “error: switch must be exhaustive, consider adding a default clause”. That means that you must account for every possibility in your switch statement code. But how smart is it? Consider this example:
let guess = 7

switch guess {
    case 0:
        println("Your guess is 0")
    case let x where x > 0:
        println("Your guess is positive")
    case let x where x < 0:
        println("Your guess is negative")
}
This code covers every possible value for x and therefore is logically exhaustive. However, as it is, it also causes the “error: switch must be exhaustive, consider adding a default clause” error to appear. I have to change the code to this for it to work:
let guess = 7

switch guess {
    case 0:
        println("Your guess is 0")
    case let x where x > 0:
        println("Your guess is positive")
    case let x where x < 0:
        println("Your guess is negative")
    default:
        println("This will never ever get called")
}
I also added another interesting feature of Swift’s Switch statement and that is the ability to make a local copy of the variable and then use that to make any comparison rather than to compare only against a constant. That is another very powerful feature.
The While keyword is another way that we can control program execution. As is our pattern, this looks like a standard c-style while loop, minus the parentheses.
var number = -100

while number < 0 {
    println(number)
    number += 10
}
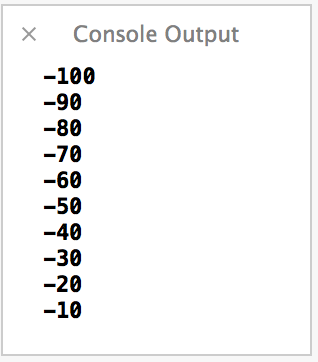
This gives us the following output:

But, what if our original value was 10, like this? Our code wouldn’t do anything.
var number = 10

while number < 0 {
    println(number)
    number += 10
}
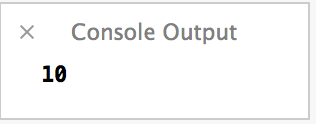
If we want to ensure that our code is executed at least once, we can employ the do-while structure, which looks like this:
var number = 10

do {
    println(number)
    number += 10
} while number < 0
Now, we execute at least once before we see that we don’t meet the conditions.

That only leaves us one last basic control structure and that is the standard for loop. I have the option of doing the c-style parentheses-free version.
for var i = 1; i <= 10; i++ {
    println(i)
}
If I’m doing a range, though, I can also declare that range in a Ruby-ish way.
// ..< does not include the upper bound
for i in 1..<10 {
    println(i)
}

// ... does include the upper bound
for i in 1...10 {
    println(i)
}
UPDATE 7/16/2014: In Xcode 6 beta 3, the Swift language was changed and the non-inclusive range was changed from the “..” operator to “..<" for readability reasons. If you are on Beta 2 or less, use ..
That’s it for control structures. Next time, we’ll take it up a notch and take a look at declaring and calling functions in Swift.

[…] the previous post in our series, we looked at control structures in Swift: if statements, switch statements, for […]
[…] gives us a lot of ways to control flow of the program. Back when Swift was first introduced, I wrote a post to talk about the ways that Swift offered to control program […]